APU by Jeff

Auxiliary power unit by Jeff Banke

Introduction

Jeff has been involved in several projects the past few years for amateur radio applications. So here's his notes:

First, the concept was to build a power box to do a number of things, so it was important to define what those things were.

  • We wanted auxiliary power sufficiently large enough to run a 100 watt radio for a reasonable amount of time. The reasonable amount of time would be based on the following.
  • The power box would be light enough not to give anyone a hernia.
  • It could be used for POTA or SOTA (the latter depending on the site may require wheels)
  • It could power a laptop as well as the transceiver
  • It could power a soldering iron (in case field repairs are needed)
  • It could be recharged by household AC
  • It could be powered by solar panels.
  • It would have metering to keep track of battery condition, usage, etc.
  • It would have a battery disconnect switch
  • It would be temperature controlled
  • It would be able to change phones and or any other USB.USB C devices

    Having defined the requirements, it necessitated the following list of equipment:

  • A large, lightweight battery which meant a 50Ah Lithium, Iron, Phosphate battery.
  • An AC charging unit
  • A solar panel controller
  • A 500W pure sine wave Inverter
  • A power distribution panel (we chose one with LEDs that indicate when a fuse is blown)
  • Metering and associated shunt, we chose a meter that provides lots of status information
  • Battery disconnect switch
  • Fan and controller
  • AC inputs and outputs
  • Anderson connectors , cigarette outlet, and USB outlets
  • A large enough box to put everything in (we settled on a Craftsman box from Home depot)
  • Appropriate switches and labeling
  • Wiring of appropriate sizes for current.

    Now having our shopping list of components we proceeded to build.

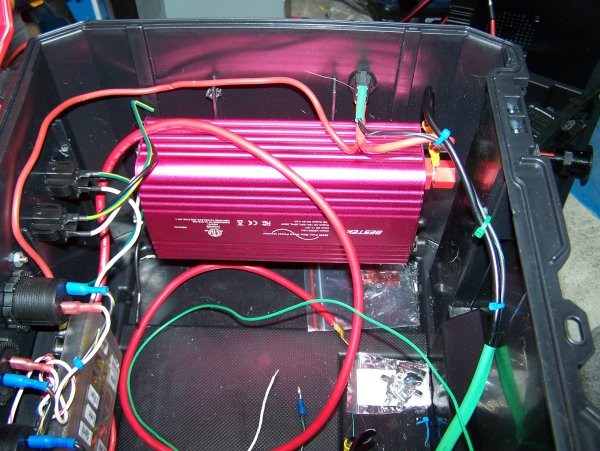
    The fourth image is the inside of the right end showing the 500W inverter and some of the wiring in progress.

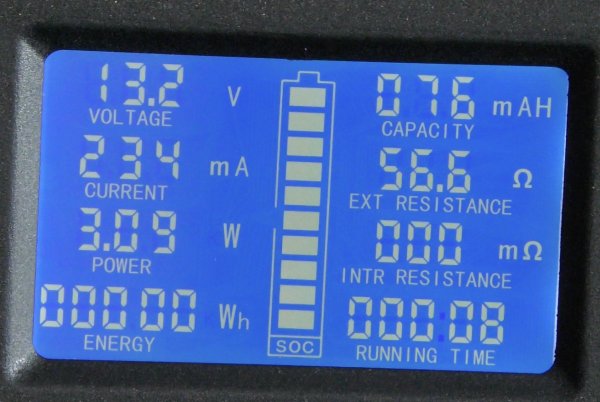
    The next image is a closeup of the metering, showing all the info displayed by this meter.

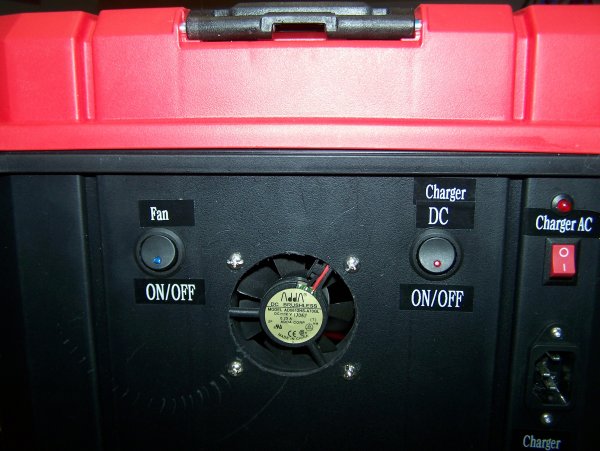
    The first image is on the left end of the box after switches, AC input, and fan were installed


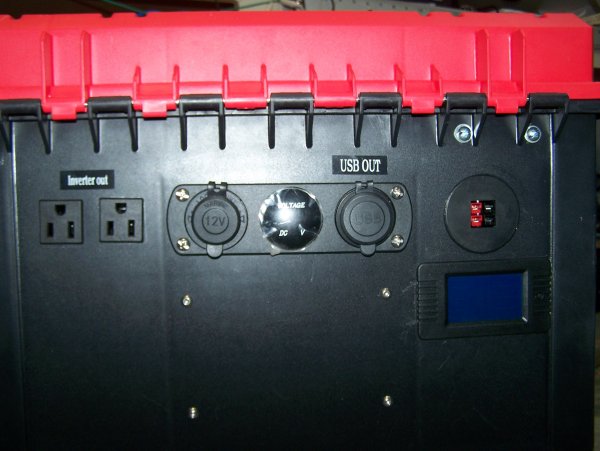
    The second image is of the back of the box (which actually is the one that would face the operator, since the metering is here). This has on the left the AC outlets, in the middle the Cigarette lighter, and USB outlets. (Originally the middle of this group was a DC volt meter, but deemed unnecessary since the other meter also displays voltage, and therefore was swapped out for a USB “C” connector). To the right are the Anderson heavy duty outlet connectors and the metering. There is another image with the metering illustrating the information that one can see on it.


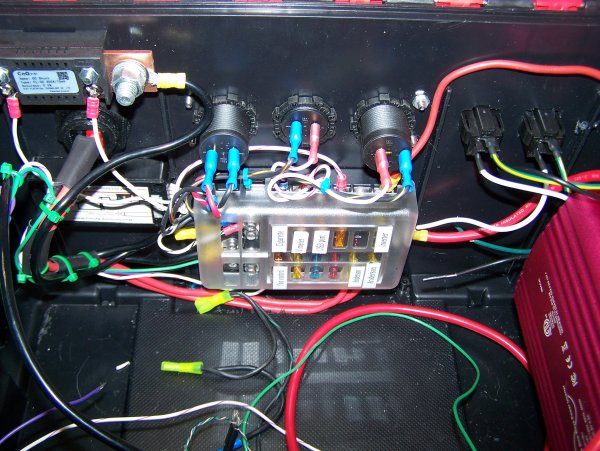
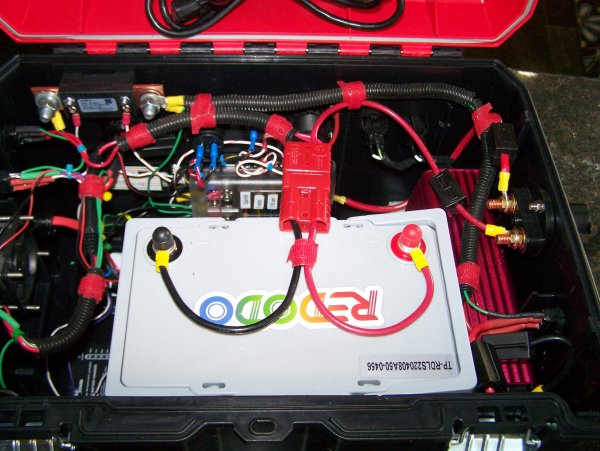
    The third image is during the wiring process showing the power distribution panel in the center, the shunt top left, Anderson outlet below it, and meter just below the Andersons, AC outlets are top right and the 500W pure sine wave inverter on the far right.


    The final image is of the completed install viewed from the top and front. Note the AC charger on the bottom to the left of the battery, with the fan controller just above it, and the solar panel controller on the floor, just above the battery, Note the use of Large anderson connectors so as to be able to remove the battery rapidly and switch it out if needed with minimal down time.


    The schematic is here in pdf form


    [SRG home Direction]