
Introduction
The Author has been building yagi and omni antennas for decades. For this project it was decided to try some of the commercially made ones. This evaluation is for the Tram antenna for the amateur 2-meter band. Ordering was made from Newegg, mail which arrived about a week via FedEx. The box was damaged however, the contents were ok. This is surprise by this carrier; usually they are pretty good about not hiring "goons" to throw packages around. (I leave that up to UPS, LOL). There were no instructions, only a cutting chart. They could have done better. It took some time to figure out the procedure.
The design is conventional bottom-feed (voltage) 5/8 type of omni. They claim about 4 1/2 db gain which may be over-rate, as many manufacturers do that to promote sales. More likely it's a standard 1-2 db over an (honest) center-feed single dipole, as industry standard. But we'll run with their figure, for now. Unfortunately, the (usual) "ham" UHF type connector is used. You would have to pay more for a type N connector.

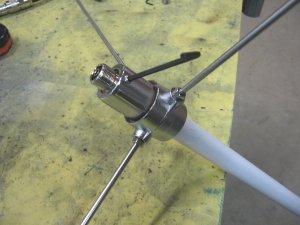
The set the resonant point at the frequency you need to operate at, first take all the components out of the store wrapping. With the 2 included allen (hex key) wrenches, used the larger one to remove the inner element. It's at the bottom of the assembly where there are 2 holes, one with the allen set screw. The other one will be used later, on the final assembly.
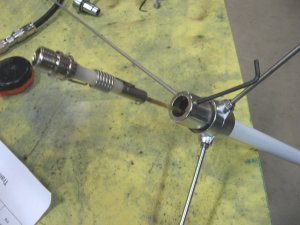
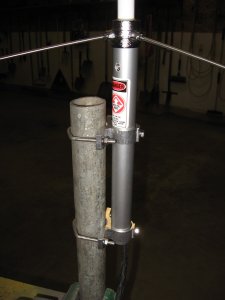
Pull the element out of the fiberglass shell. Using the smaller wrench, loosen the upper element. The set screw is in the middle. Adjust the length per the (included) cutting chart. It's not really that, since you won't be cutting anything (that's a good thing) but handing the element length. For example, at 146 MHz the length will be around 1168 mm (46"). Set the screw and push the antenna element back in the shell. Set the base screw and assemble the entire antenna assembly to check for return loss. Don't bother tightening up the screws tightly, sealing the base pigtail etc., until you are satisfied with that figure. Typically, it should be around 20 db. If this is so go ahead and take the assembly back apart, tighten the set screw on the element and the base for final torque and seal the base/jumper cable with at least a layer of 3M 33 or 88+ tape. The round mount cylinder does a rather good job of keeping the weather elements out. If you feel compelled to keep the bugs out of the tube this would be a good time to apply that expanding foam sealer as well. Otherwise, wait until you have installed it a the final radio site to verify it's working properly. If in repeater/duplex operation check for any transmitter associated design as well.
Here's some unsorted images to illustrate what was done. Perhaps more information will be posted, later, as time permits. It's apparent this product is probably a Chinese "knock-off" of the Diamond brand, made at an "ant hill". That's referring a sweat shop in China by industrialized China workers desperate to have a job to stay alive. They have are trying to make a product, too. Just keep in mind QC may not be in place. "Your mileage may vary". In conclusion, it's a good, cheap antenna for $50. Time will tell if it holds up to a low-level sight. The Author will also look into the multi-band ones, if available.
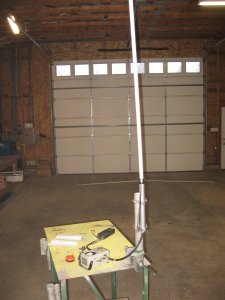


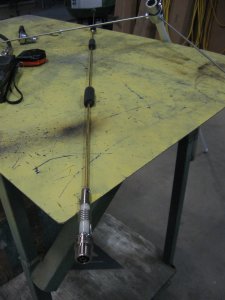
 This one picture you can enlarge.
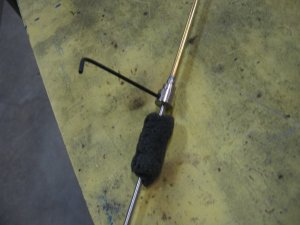
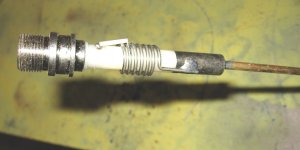
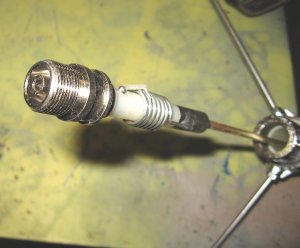
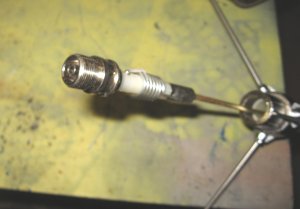
Chart For element length adjustments
This may be copied in complete form only for non-profit purposes, such as for the knowledge for the Amateur Radio Service, with the Author credited as designer. For other arrangements please contact the Author.
Copy write: AK2O 2017
![[SRG home Direction]](images/srghome.gif)