Here's some tips for general sled prep for summer or winter, plus some other ideas the author came up with over the years, working on various sleds, such as a '73 Yamaha 292, '97 Arctic Cat 580, 03' 1M 600's (use at work) and 800 1M. Most of the sleds are sold and gone, but the ideas are forever and you might find them useful as well for any brand of sled. As you can tell, the first two sleds were carburated. Carburated sled are fine, a lot of fun to "tinker" and play with and gives you good control on how you want to set it up. Since then the author was interested in more riding and less "wrenching" so, have moved on to an EFI sled, which is described later in this article. For this section we will cover some points on both types of sleds.
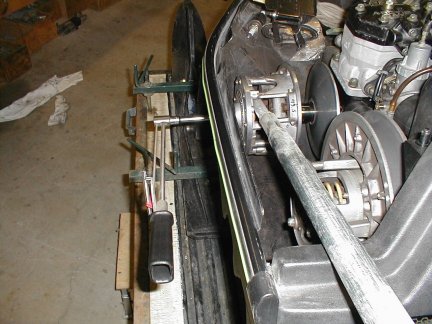
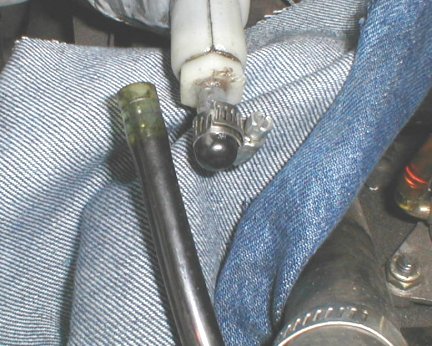
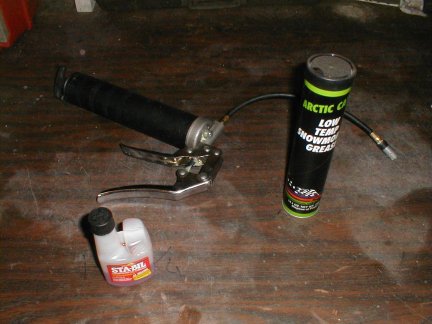
In the case of the primary clutch (which might have been taken off, and now, putting back on) you need some how to hold it while tightening the bolt. You can "lock" the primary clutch by using a pipe, taking care not to mar up either the clutch or the frame, with a cloth on the edges. On the right is a neat little oil plug locker, with the little hose clamp around the rubber nipple it keeps the oil intact, awaiting for engine hookup. Obviously, you need a rag or two, ready to catch the oil, once this is done. Or you can suck it out with a neat method described, next.
Here's a cool way to drain your chain case oil, coolant and other fluids. Using an old plastic 5 gallon paint can and cutting a hole for the size of some clear (so you can see what's happening) tubing that's small enough to get into the chain case dip stick hole and the other tight spots. The paint spout is good for gluing a couple of 90* bends of plastic pipe for the vacuum end's hose to go into. Just turn on the vac and suction holds the hose inside the pipe fitting, or you can duct tape it as well. The author prefers not to, for the convenience of the hose falls away once done sucking and turning off the vac. Other vac's (such as your wife's) might take a different size pipe fitting, so you might have to use a reducer, all available at your plumbing store. Then you can easily carry the contents away, without the spilling problem found with open shallow tray type pans, for easy disposal or reuse later. The author's even sucked gas out of the tank for summarizing. When sucking gas be extremely careful, for example, have two other people stand by with an extinguisher, a running water hose and where a suit. Sucking gas can produce static electricity, and BOOM!. There, you've been warned. No mess (unless you blow yourself up), and you can use the paint can many times and still keep the inside of the vacuum clean. If you use the wife's vacuum that'll keep her happy, as well.


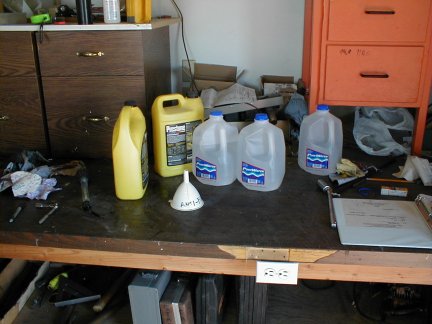
Next, to prep the coolant. Most brands are the Ethyl type. They do make a Poly type, which is "kinder" to the engine, should it get inside the wrong areas, however has a slightly less efficiency than the former type. Now that the stuff's ready to mix up. notice the choice of colors for the cups ! Measure some oil in the purple cup for the amount of gas going in the tank. This mix is for the first tank only during the break-in period.
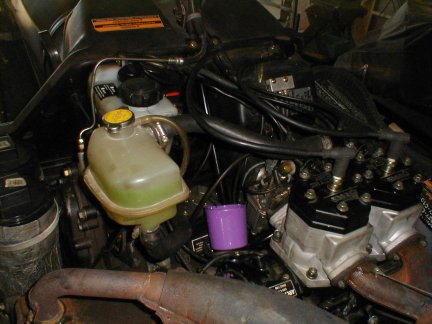
The 580 engine has a "weep hole" this allows any coolant leak to run out as not to get into a 'bad' area of the engine and also tell's the user the seal is going out. If you look closely you can see the pump shaft showing. Next, the three bolts holding the thermostat header is loosened.

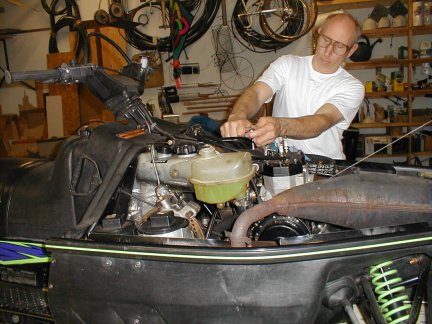
Then sled is tilted back. Now the coolant can be pored (backwards) down into the engine, with the top end just a little higher than the bottom of the coolant reservoir. This pretty much fills the engine, tubes and exchanges. Because there is no 'relief' exit, there will be some air trapped in the lines and exchangers(s). The reservoir is lower, so even it will start to fill when the level reaches the top of the engine.
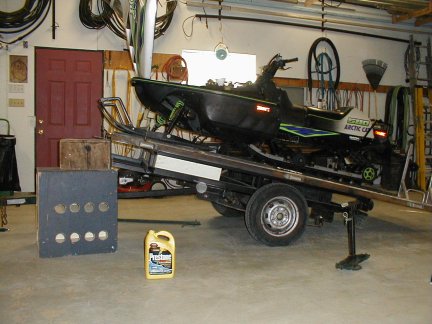
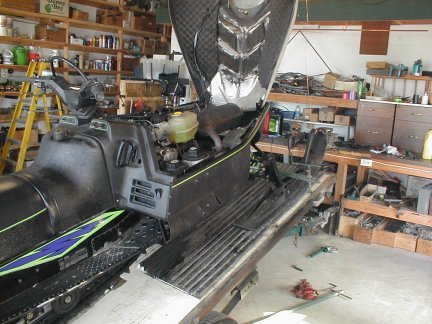
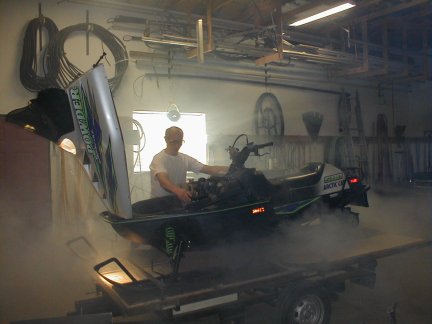
Having a trailer that does this is really handy and an effortless task, plus with some boxes the correct angle can be obtained. On the left is that neat track stand to align the track or just plain run the sled. Tie the hood with a string/rope going forward, so it doesn't come slamming back down.
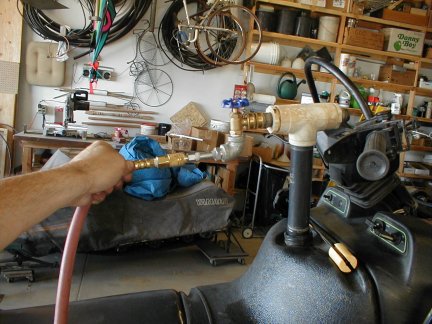
Here's another cool procedure. Priming the gas. Take an air compressor and turn the regulator WAY down, to about 2 psi, then with some help from a PVC pipe collection a temporary adaptor can be made, to the air hose, even with a control valve, as seen here. A few layers of electrical tape provides sufficient seal to the tank opening. Pull the gas line off the pump to catch the gas with that little purple cup that had the oil in it, from the mixing step. Then crack open the valve until the gas starts running into the cup. Then you can hook up the tubing to the feed for the carb, and "push" a little more gas, so the bowls start to fill up. This will greatly reduce the cranking effort to start the engine. Remember to be real careful not to blow a gasket/seal with the pressure you are using. If you choose not to do this part, just continue on to the next paragraph.
Before starting the engine, lock the oil injection valve in the open position (works off the throttle cable) to allow maximum protection on initial startup. A short piece of copper wire (from romex) does this nicely. Reconnect the gas line and pull the rope about 20-30 times to get the pump to fill the carbs. If you already "pushed" some gas through (paragraph above) you only need a few pulls on the cord. During this you can also remove the spark plugs and pour a little oil inside to lube the sides of the cylinders, then put the plugs loosely on, and give a few pulls, with the ignition off. This just helps lubricate the inside, just prior to firing. Then put a little gas out of that (handy) purple cup (oil/gas mix) into cylinders and re install both plugs and tighten, and turn the ignition on. Usually a pull or two......and rummm rummm rummm rummm rummm it starts!! After a few minutes and you are satisfied the engine is getting plenty of oil (you can tell by the smoky room) remove the wire holding the oil pump lever open. Run it more to let the thermostat open and circulate the coolant. Then let it cool to "burp" the system and do this a couple more times. There's usually other stuff to do around while waiting it to cool down, like cleaning up and other chores.
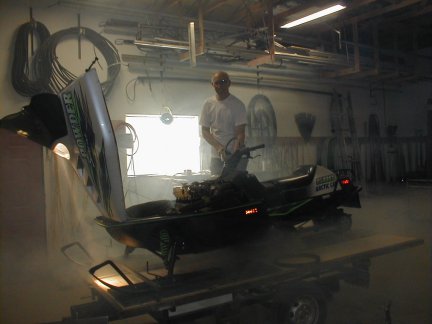
Ahhhh! what a way to get into the season, with that engine running and stinking up the place ! If you're going through snow withdrawals, there's an engine button to get off on, recorded of the 580 when it was warmed up. There's two button-links, depending on which one your browser works on.
| Engine button #1 |
An EFI sled requires less maintenance and is easy to start during the season. In fact, the engine will start easy in any temperature, altitude and just about in any position. If you happen to roll it in the snow and it's still running, try to shut it off soon as the oil injector line will get a bubble and cause problems later. EFI is controlled by several sensors, feeding a "computer" module, who then decides how to control the engine's functions. We will cover some of the prepping needed for an EFI sled, here.
Occasionally, you should clean the injectors. This should be performed in the fall/during the winter. When you treat the gas tank with the appropriate amount, you'll be running it through the system on your next ride. However this "treated" gas should not be left in the system for very long. Besides cleaning the injectors there is a possibility it will also "clean" some of the seals in the fuel system. Therefore, plan on running almost empty (don't run out on the trail) on the return trip to the trucks. Back at home drain the rest of the gas in the tank. Assuming you'll be riding the next weekend, at that time, you can fill up. This will greatly dilute any injector cleaner, to which you'll be using up on that next trip. By the third trip (and fill-up) there should be only a trace of it. If you are concerned about getting it out of the system sooner, the Author treated a tank of gas, went riding, then returned home and drained the tank. Then put in a gallon of fresh gas, ran the sled enough to get the new gas into the system and fuel manifold, then drained the remaining gallon again. For the next trip (and loading up in the truck) the Author will put enough (fresh) gas to do that, then stop by a station to fill-up. This just speeds the 3-flush procedure up some. Also, the fresh gas used, plus any fill-ups are obtained out of the County, where it's not oxygenated. Even though so-called "reports" that the Spokane area is not doing that anymore, a oxy-test showed positive on the last test. Therefore, out of town gas is used. The two major brands used is Chevron and Shell. Also, because of the middle East situation and reports of poorer gas (even some with water in it) the Author now uses the next octane step up from regular (87) to the 89 rating. This is just another precaution against pre-denotation, which is extremely hard on piston heads. It's that "ball bearing rolling around" sound you hear when demanding power, at low RPM in your vehicle.
Spring is a time when you might start thinking about summarizing your sled. You can either empty the gas tank, or keep it full. The latter has several advantages. For one, a full tank to prevents a possibility of condensation in the tank. Second, it reduces greatly the need to crank the engine to prime the fuel manifold to start it. For these reasons, the author chooses to leave the tank/system full over the summer. Since the gas will be treated, that should not be a problem. Another option would be to empty out most of the gas in the tank, in the fall (use it for the car, etc.) for just enough for starting. Then going to the first ride, you can stop by the gas station to fill with newer gas. What older (treated) gas in the system will be run through in a short time of your first ride.
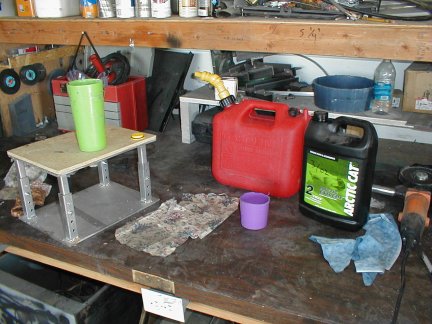
Being organized, the author planned this procedure. Treat the gas on your last anticipated trip of the season. Near the end of the (last) day, returning to the parking lot, pour in the appropriate amount of treatment. Typically it's 1oz per gallon, but read the label. The mix sloshes around nicely on the trail and gives a chance to run through the entire fuel system, and you are riding as well, instead of on a stand. Is is also true for carbed sleds. After loading up, but before going home, stop and fill the tank and mix in the rest of the bottle of treatment. Or you can wait, if you might go out again. If so, you only need to repeat the last part on the trail. This way, you won't be wasting a bottle of treatment on a change of plans. Or, if you don't like to carry that little treatment bottle on the trail you could finish the process at home. Shake it around a bit. The Author's summer stand allows rocking the sled back and forth easily. If you don't remember to do this and end up home you can still perform this, however you'll need to run the engine enough to treat the entire fuel system, being careful not to over heat the engine due to lack of (cooling) snow.
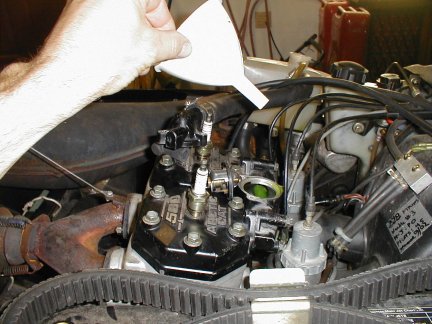
At home, assuming you have stabilized the fuel, run the engine for the final prep, about 5 minutes, then spray each throttle body with fogging oil. (This applies for carbed sleds as well). Some day the Author hopes to invent a "Y" tube to hit both bodies at one time, also make it flex around so the spray can be operated right side up, instead of the (dumb) way the can ends upside down. In a few seconds the engine will slow down; turn it off. Don't run the again, engine until next fall. Spray the cylinder walls through the plug holes with the oil. It's a good idea to also put little APV oil inside, and pull the engine slowly over just once. Put the plugs back in to keep any pesky fly or bug from going in.
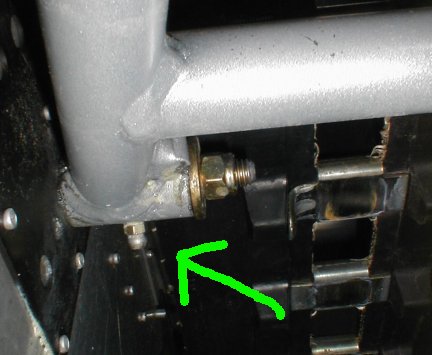
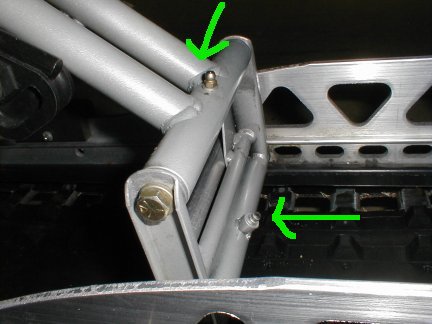
Hit the zerk fittings. For the 1M, there's one on each side on the forward upper suspension arm as the right picture shows. Another comment about this picture, you might have noticed Cat changed the front bolting mount so you can grab both ends to remove. This is a great improvement over the older sleds (like the 580, above) since they had the front tube go across from side to side and you needed to use a locking "stop" bolt/nut arrangement to get both ends loose. A simplex 'fix' once you found out about it, but can be frustrating to find this out the hard way.
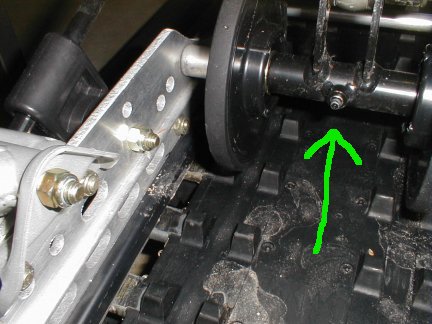
Grease the one on inside boogie, (left picture) and two more on the rear arm (right picture). That's a total of 5 for the suspension. They look clean because the excess grease was wiped off for these pictures. Grease the two for the front suspension; there's one behind each ski post, pointing inside. Also, grease the speedo adaptor and one behind the secondary clutch bearing. You will need to lift one side of the air box just a little for this last fitting. That should do it with a total of nine grease points for the sled. A word about the speedo zerk. Because the inside bearing on the left side of the drive shaft is exposed on the later years, water can get inside the bearing. Therefore, you should grease that one on EVERY return trip to push any water out and grease in, as well. 3-6 pumps should do it. Look underneath to verify the old grease and water being pushed out. Otherwise, you'll get some rusty bearings soon, if not over the summer.
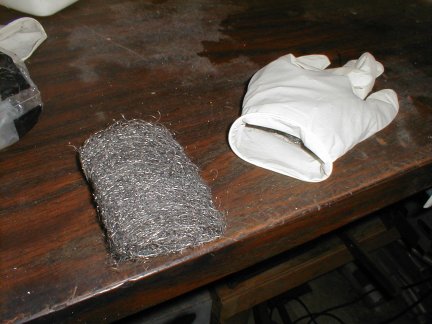
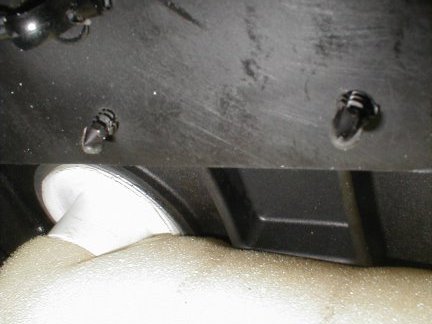
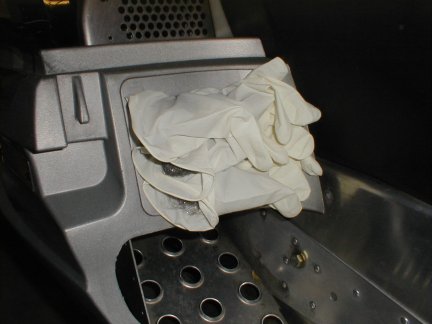
Critters, such as mice love to make nests everywhere including ports in your sled. Mice eat just about anything (arrghh!) except steel wool, which makes a great barrier. One possible "glich" would be a piece of steel wool being left behind in the fall, just to find it's way into the engine, while your doing a hill climb. Therefore, use some painting gloves to stick them in. And if there's any attempt by these little darlings you'll see the evidence in the latex. So, to start with, put two in the air box intake. If you notice the foam, that's not for the intake blocking; it's merely to hold the next idea, below.........
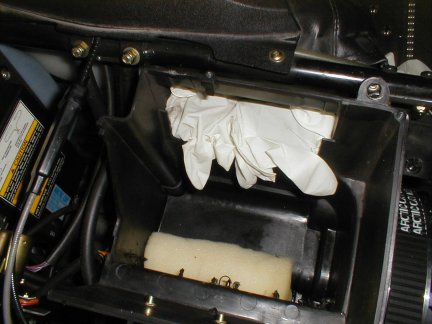
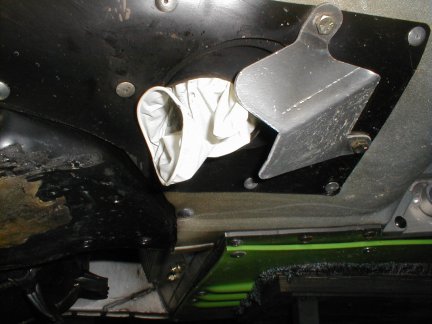
For an extra amount of protection take two spray can lids, cut them down to about a disk, being careful to clean off any plastic shavings and covered each throttle body intake. The foam is to hold them in place. Here's a closeup view on the right.
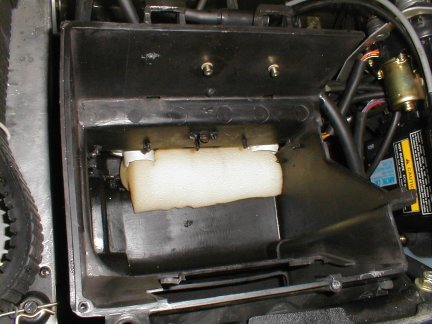
Plug the outside slots for the air intake as well, and of course, one for the exhaust pipe.
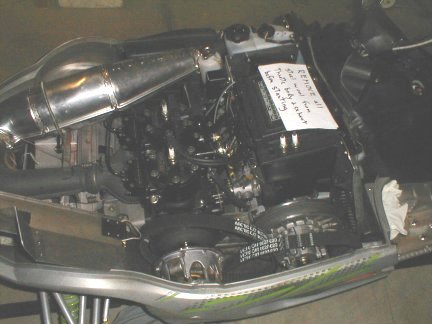
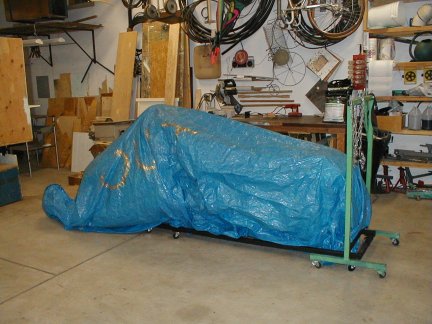
Put the air box lid back on (tool compartment), with an obvious note to remind me in the fall about the plugged ports. Also, relieve both belts of tension and just lay them inside. Then cover the hood with a cloth (was the bedspread) so it doesn't get scratched, then a plastic tarp over that, and store indoors, for no condensation problem. That keeps the sawdust and other stuff off, so in the fall you'll have a clean, prepped sled !
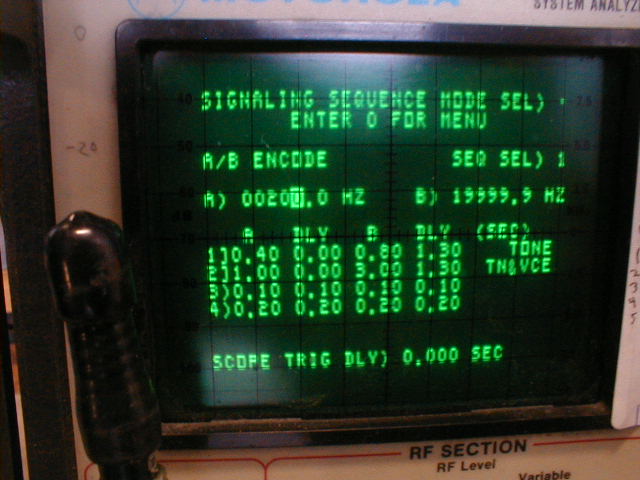
Ever wonder if your tachometer is accurate? Here's a nice way to check it. Most twin engines use one common high voltage coil for both plugs. Therefore, for each revolution there's a "freebe" spark, meaning the spark rate is double of the R.P.M.
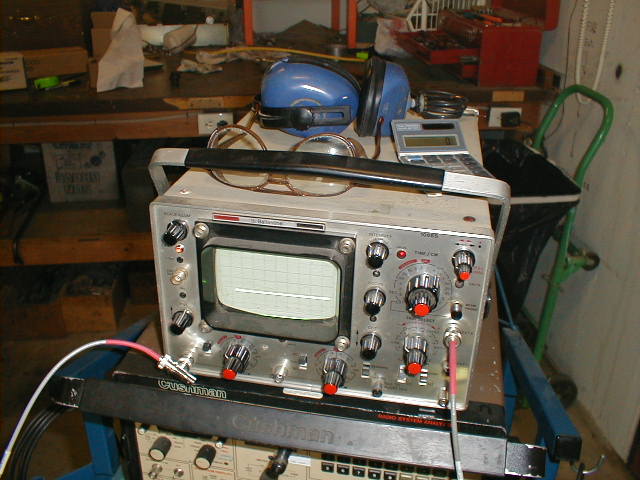
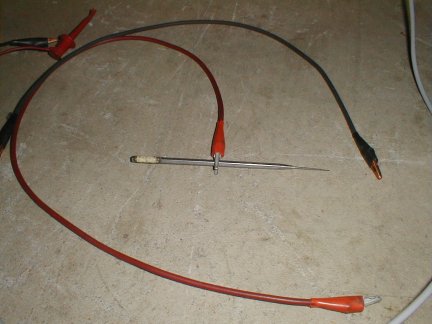
You can measure (very accurately) the spark rate, or frequency using the Lissajous pattern method with an oscilloscope. You start with tapping the primary side of the coil, using a sharp probe, which can pinch through the connector insulation, without causing such a wide opening to let water in later. You can use a dental pick, then clip on to it to connect to the scope's Y axis input. With a high quality audio signal generator, input the scope's X axis input. When the two inputs are equal in frequency you will see the (distorted, but readable) waveform "hold" still. A simple formula converts your reading to R.P.M. on the tach.
RPM
____times 2 = spark rate (frequency)
60
Here's a handy table............
|
Handy Chart |
For Tach |
Calibration |
Remarks |
|
Spark rate/frequency= |
R.P.M. |
|
|
|
33.3 Hz |
1000 |
|
Idling |
|
66.6 |
2000 |
|
|
|
83.3 Hz |
2500 |
|
|
|
100 Hz |
3000 |
|
|
|
116.6 Hz |
3500 |
|
|
|
133.3 Hz |
4000 |
|
|
|
150 Hz |
4500 |
|
|
|
166.6 Hz |
5000 |
|
|
|
183.3 Hz |
5500 |
|
|
|
200 Hz |
6000 |
|
|
|
216.6 Hz |
6500 |
|
|
|
233.3 Hz |
7000 |
|
|
|
250 Hz |
7500 |
|
|
|
266.6 Hz |
8000 |
|
|
For example, to measure an R.P.M. of 6000, set your audio generator for 200 Hz, into the scope.
Using a dental pick and clip leads, you can "tap" into the coil wire with minimal insulation opening

Start the engine (warmed, up of course) and hold it at 6000 for a short time, long enough to observe the "still" waveform on the scope. If it's not still, you can "hunt" around by changing the engine RPM until it's still, observe the tach reading and note any error. The Author's found typical errors of 150. With this model he found the tach reads 200 RPM high, while one of his bud's '01 Polaris RMK is right on.
It's hardly worth mentioning (it's assumed you are an experienced mechanic) about needing to raise the track off the floor, provide a safe take-off point and wear safety glasses, hearing protection, since the track will be spinning fast. Also to allow proper engine warm up. It's easier with two; one to hold the probe, etc.
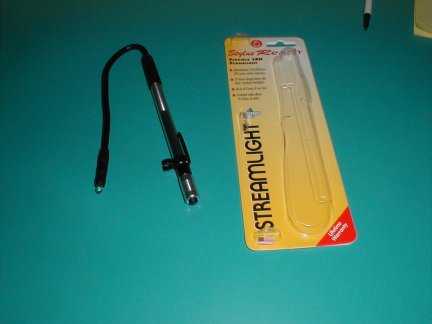
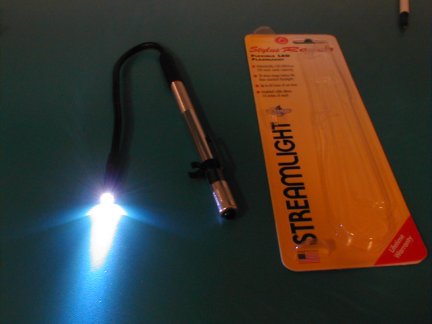
Here's a neat light for inspecting those tight spots, such as inside the cylinders, or even a gun bore. It's good quality for $24us and you're not paying for the "Snap-On" name. It's on their web site plus a bunch of other neat LED lights. It takes special "AAAA" cells. That's FOUR "A"'s not to be confused with the more common "AAA" "AA" cells. A sporting good store, in Spokane valley mall was located, to have these cells in stock. The light is too bright for a gun bore inspection, so you can put in one "dummy" cell, to lower the voltage, thus the brightness. The Author used a wood dowel and wire of the appropriate size.
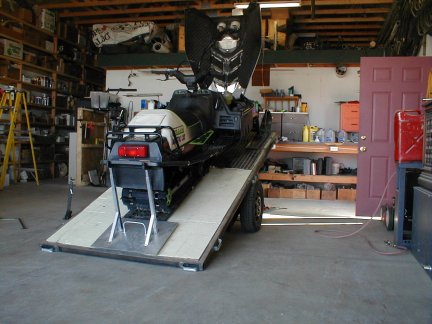
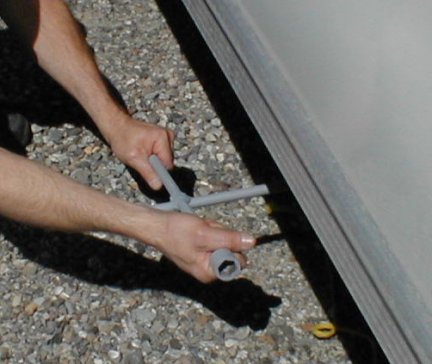
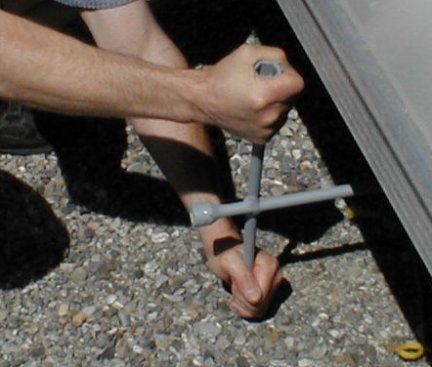
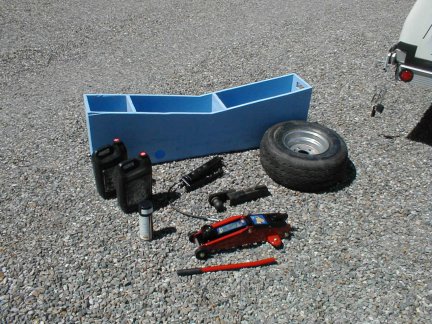
For work we use a 2-place trailer for the two sleds we (presently) have. Here's an idea for the trailer. In the event you get a flat, most of those lug wrenches don't clear the edge of the bed, so when you "break" loose, turning a lug nut, och! your hand hits the trailer edge.
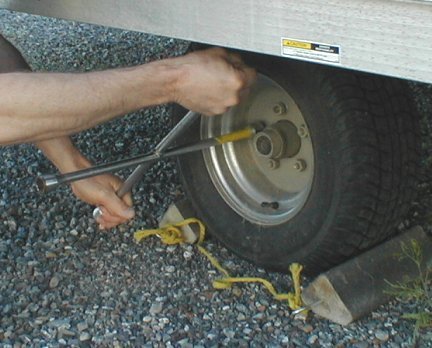
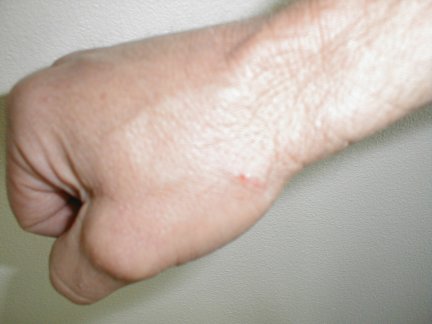
One cure is to modify the wrench. Since you only use one size (hopefully!) you can offset the "X" wrench into a "T" wrench with the same leverage, and it clears the trailer edge.
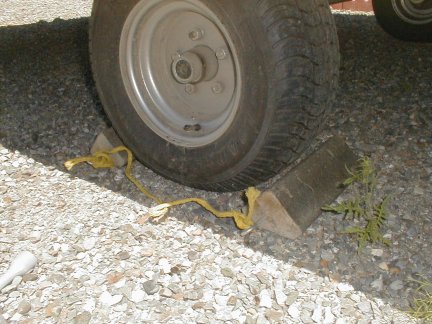
Those flat bed two place trailers have a nice option of a cover. They open from the front or back, so you can drive on, drive off (with ramps). Be careful in windy conditions as the top can slam down and break something. If you're storing the trailer a slight hill, old lumber, or in one case, left over "trex" cut in wedge shapes with a little rope that makes nice sets of tire chalks.
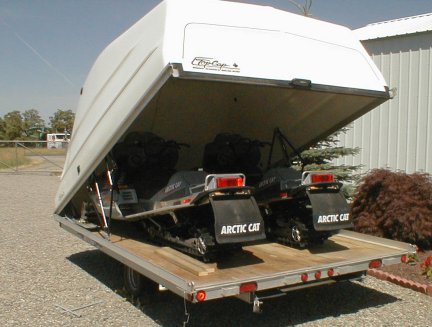
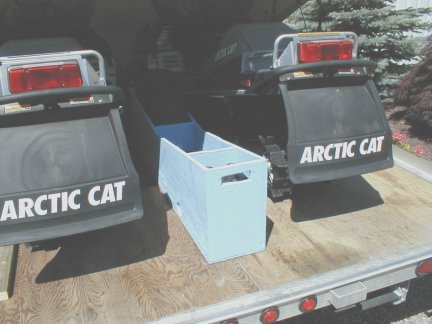
This one doesn't have any place to put accessories, such as a spare tire, jack, oil, etc. Rather to have them just roll around inside, the Author built a handy box that sits between the two sleds, out of some left over plywood, paint, nails and glue. He drilled holes in the bottom of the spare tire compartment so melted snow doesn't sit in the bottom of the box. He made some square holes on each end to assist moving it around or carry it. Since he does have a trailer, (it was sold; that single place, as shown above), he used the sleds at work to perform these ideas.
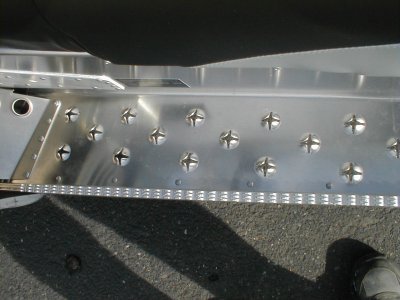
As your sled ages, more miles, etc. the tunnel's rivets will need some maintenance. Here's a typical arrangement of "pop-rivets". For more on this subject click on the image.
In the event you wish to replace your flap or need foam for your seat, there's a company in town, for both items:
Notawater, Co. (open M-F, normal hours)
1309 N. Bradley, Spokane
922-4522
![[Karl's sled page]](images/winter_home3.gif)