This page is under construction.
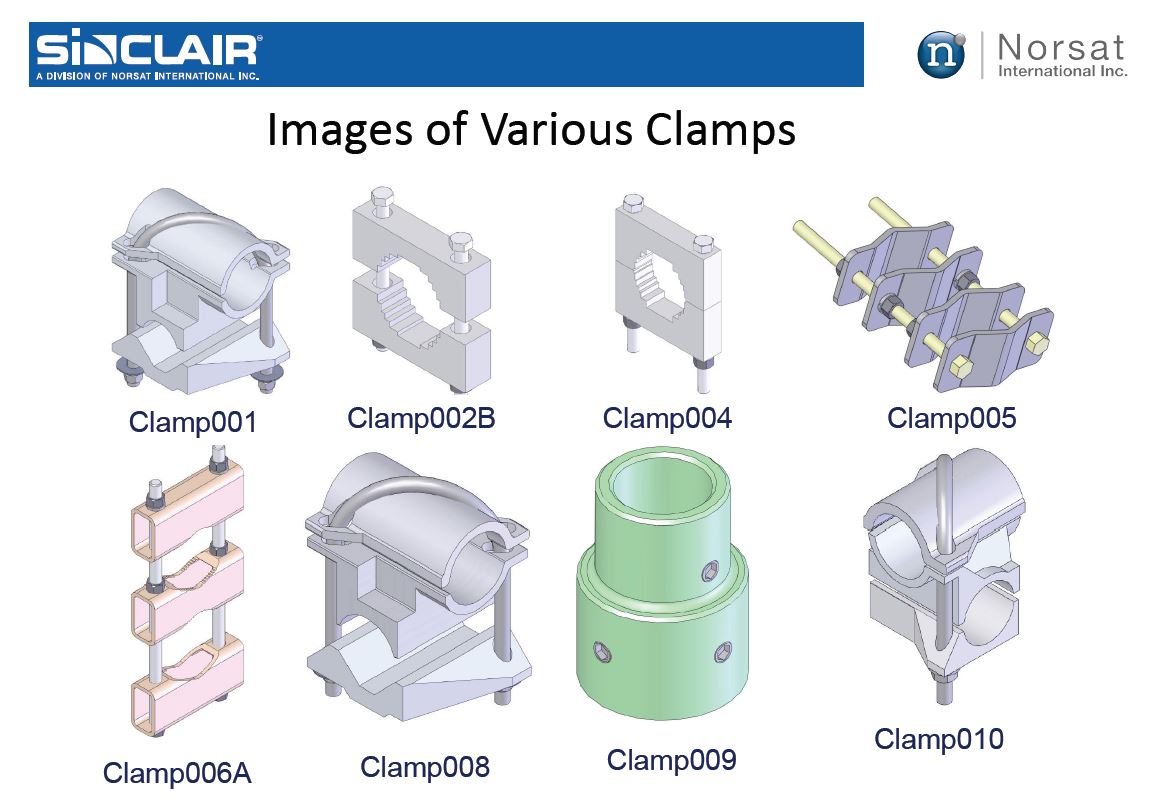
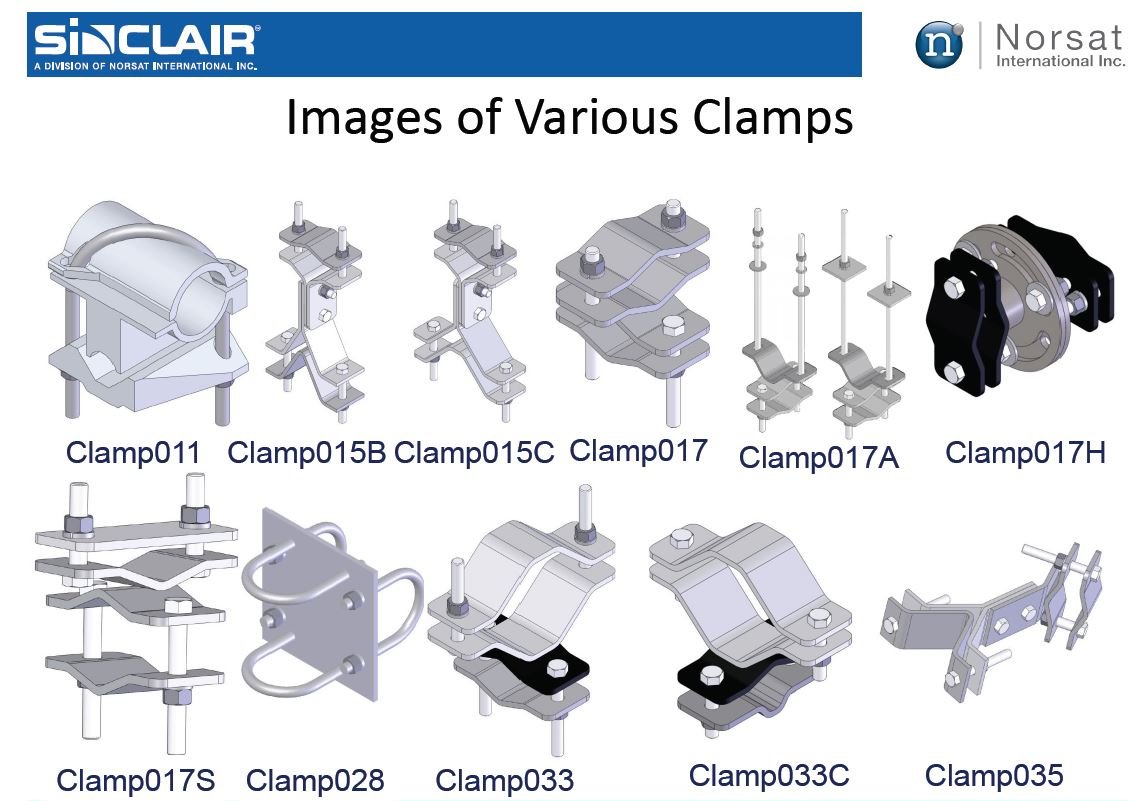
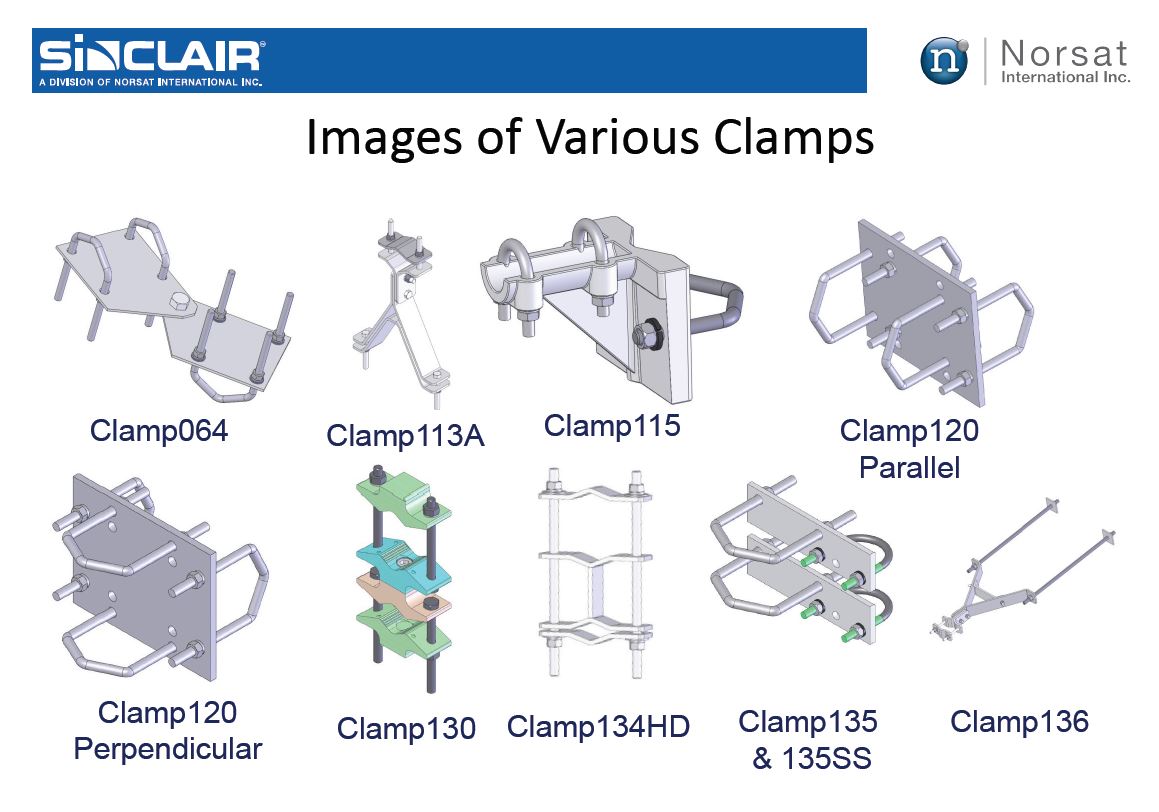
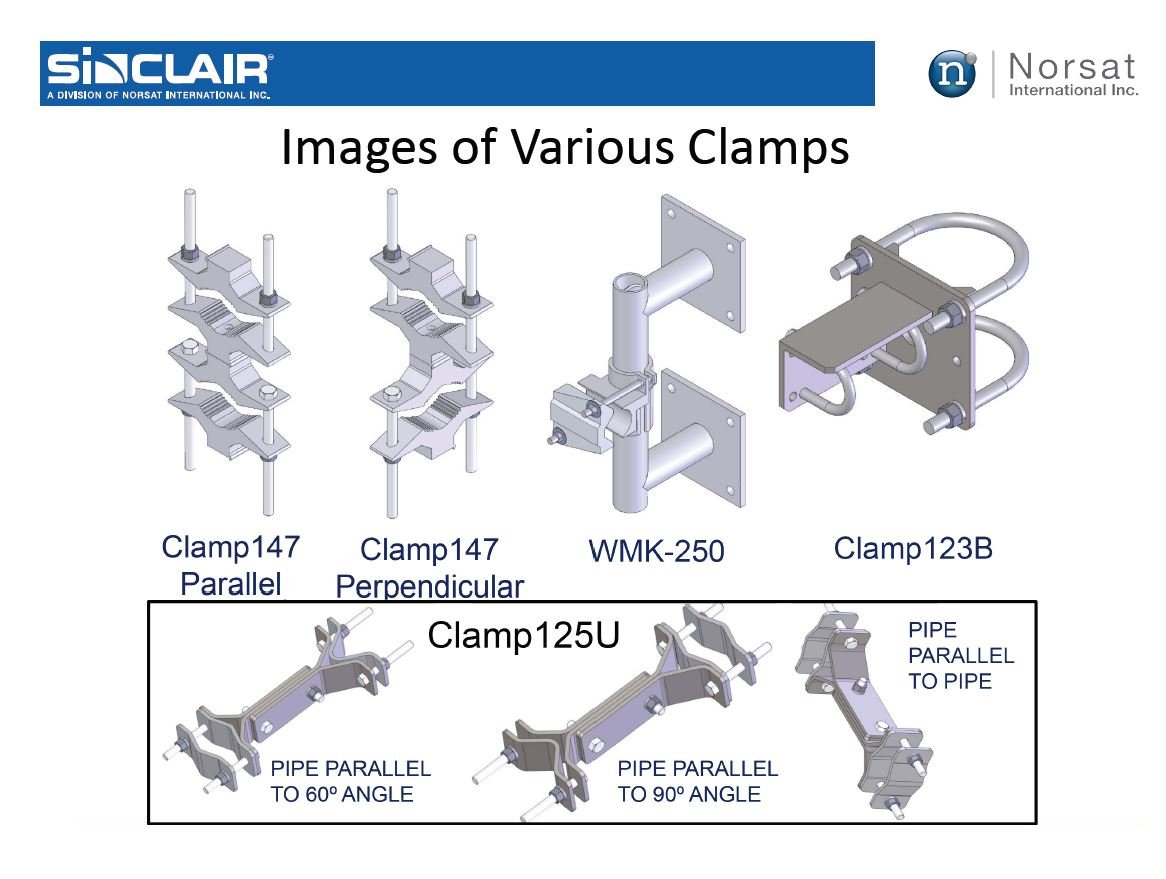
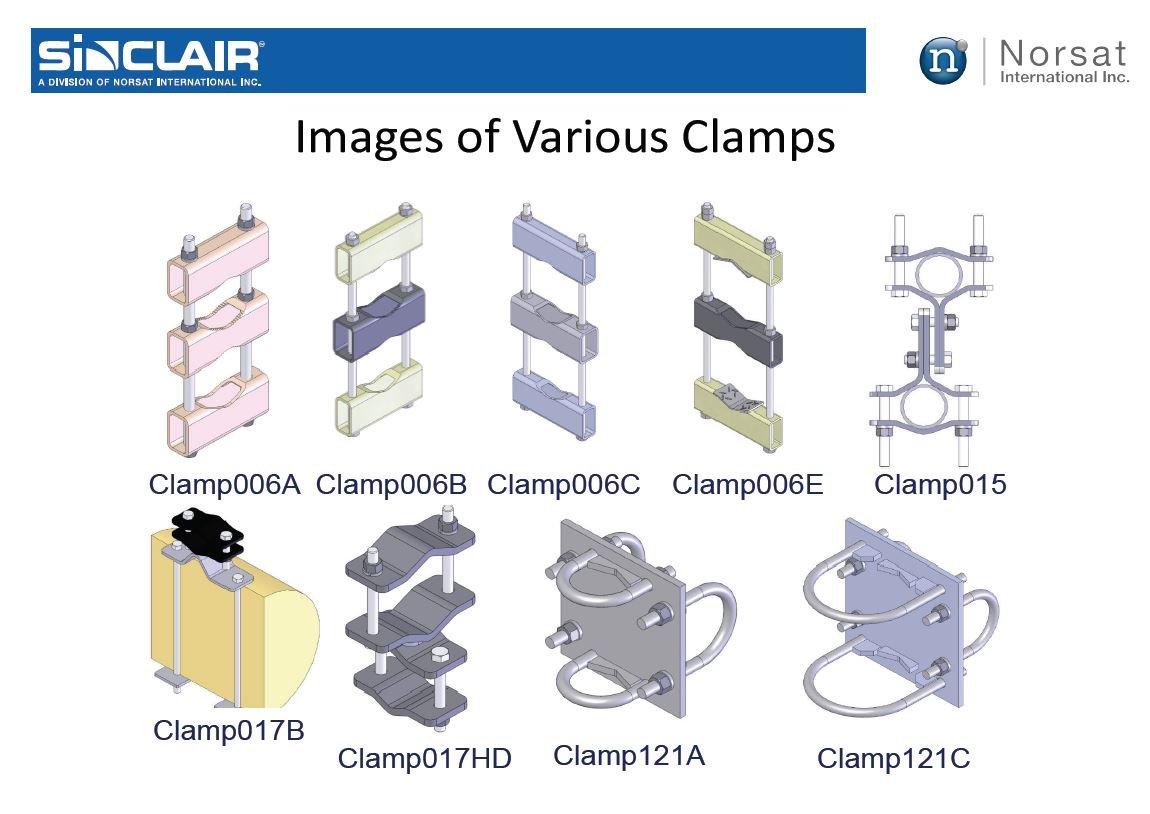
During antenna clamp research here's one OEM list of the types:
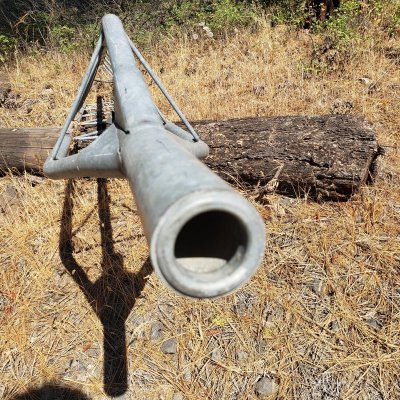
One of the most popular towers made by Rohn is the 25-G series. On the left is the standard (10-foot)section. The other images show the top section. There are two types; the flat top has a provision for a thrust bearing while the other comes to a point with a vehicle pipe to run the mast through for a turning type antenna (presumedly directional).
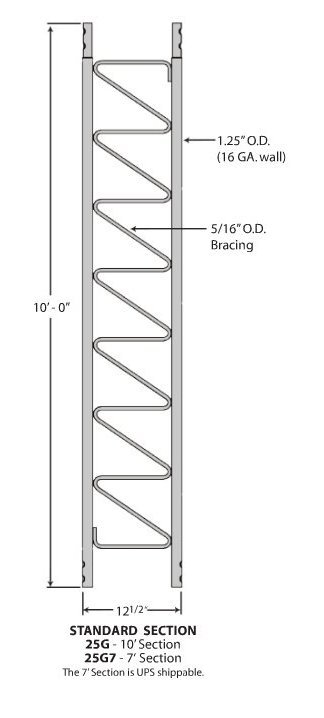
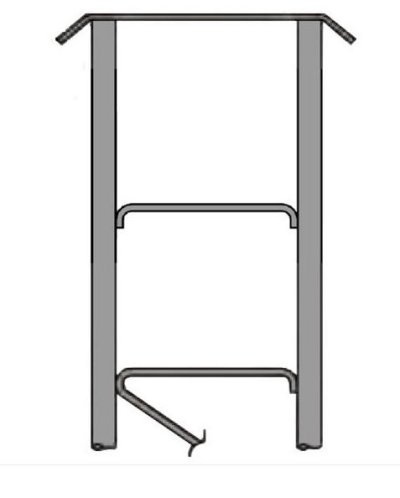
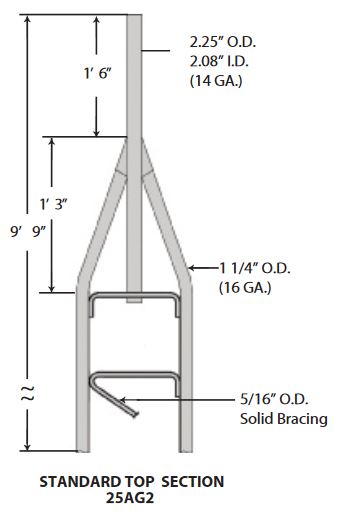
On some of these top sections have a "reducer" at the very top end. In the event you end up with this type and wish to use a larger pipe in inside, it's believed you can knock out this reducer. One way is to put another pipe about the diameter of your final mast up inside the sections pipe and pound it out (up direction). Each section is easy to handle both on the ground and during an install vertically (with a jin-pole, of course).
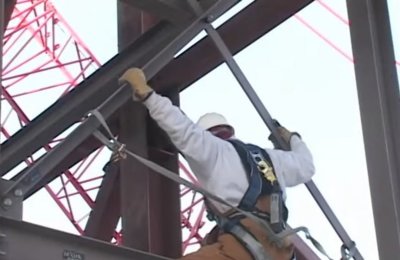
Tower climbing does have risks. It can be dangerous if persons not trained by a certified source. Proper training on safety techniques, efficient work methods and a good and a careful attitude is essential for a successful project. In addition, all ground (helper) people need to understand and deal with the possibility of falling objects. Every one on the project sight needs to wear protective gear such as a helmet. Metal falling objects hitting one's head is usually lethal as well. The Author has been performing tower projects since 1973. This includes antennas, feed lines and other gear installation on various towers anything from the common Rohn 25 up to the monster broadcast ones, exceeding 500 feet off the ground.
.jpg)
Here shown is a sample of some of the gear the Author uses for tower climbing. Starting in the back it's a good idea to have a few "slings". These are handy to wrap around large anchor points, such as a tower leg or cross member. These shown are "home-made". Industrial strength thread was used on a commercial sewing machine to accomplish this. Several runs of the thread were sewn to make it as strong as the webbing itself. There are however, store-bought slings available as well. On the upper left is just some common nylon small rope pieces. They are handy for tying items off on the tower, while you work on other tasks nearby. You can enlarge this image by clicking on it.
The rest of this imagine shows the different type of carabiners used. All of these are meant for right-hand operation although, with some practice the left hand can be used. The word "carabiner" is a shortened form of Karabinerhaken (or also short Karabiner), a German phrase for a "spring hook" used by a carbine rifleman, or carbineer, to attach his carbineer to a belt or bandolier.
The back two rows of carabiners is the latest and best to use. They are non-snagging. The forward row has some of these, in various forms, D, and oval, etc. The front row is the older ones uses. These have the disadvantage of snagging on rope. There's more images below showing this. In the front right is the variety of pulleys the Authors uses. Some of them are decades old, so are use for non critical uses, such as ground rigging. The blue pulley in the center is the latest being evaluated and supports up to 15mm rope size. It's possible this will be the main type used for future projects. Larger rope OD is easier on the hands when hoisting items up the tower.
As mentioned above, the carabiners towards the rear are the latest ones used by Author. These have a nice gate that does not snag on rope. Some of these are straight gate action while some are the twist locking (auto) type. As above, some shown here are the older type. Note they have a "hook" on the end of the opening. This tends to snag on a tope. Therefore, these are being retired to non-critical uses such as ground based, non tower anchor points, such as securing an ATV on a trailer, etc.
The others without that "hook" is best. Most of these (newer) carabiners were obtained on line. Amazon is a mixed "bag" so it might be good to search around on line for local venders as well.


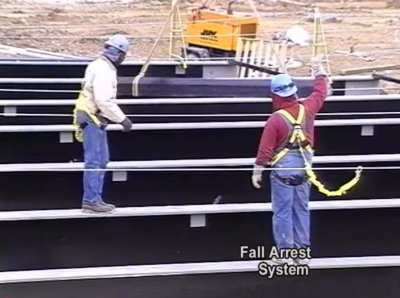
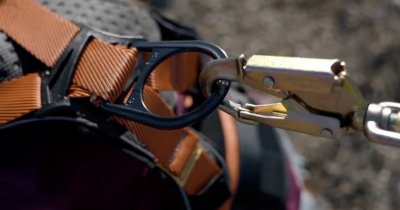
The Author normally researches and questions everything before it is posted on the SRG web site. If it cannot be confirmed for accuracy it is left out. This is especially true for safety information, more specifically tower climbing and equipment install there. One of the questionable subjects is positioning-connecting fall arrest equipment. As you can see in the pictures the clip on the back of you harness can be done either way. This will need to be further researched and verified. As always the Author is not responsible for any harm to the reader or passing on this information and will be held harmless in the event of something bad happing. This page is a supplement with additional information to improve one's knowgebase and not a substitute for certified tower climbing training.

On all equipment, look for the rating with the UIAA.
The Wiki has a good explanation on this.
Here's some links you should check out for safety and standards. Even though they are for rock / ice climbing they are relevant.
Alaska site #1.As of 2023 the Author found a nice company in the USA. They have tower supplies such as the carabiners, pulleys and even entry rubber inserts for the kits that don't have them.
Here's a company that makes a nice capstan winch great for pulling items up a tower up to one ton.
For tower hoisting it really works well. The Author has used this on a winter rescue event.
It uses an external 12v automotive type battery so it's great at an off-grid site. As of 2023 it's around $800 OTD.
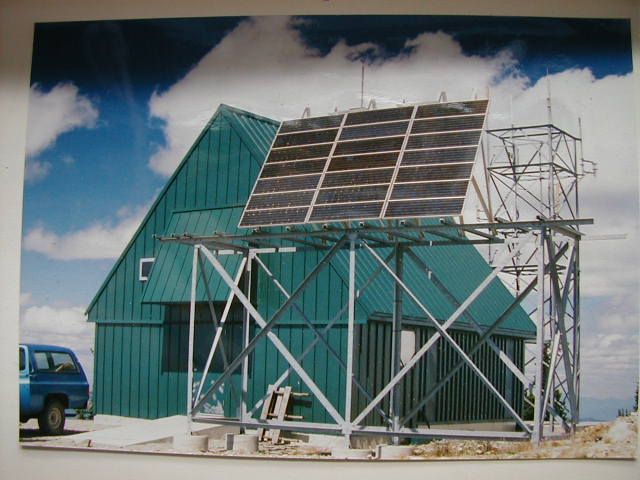
Remote sites can be very harsh in the winter. That's why the example of brackets are posted at the top of this article. For example, here's a high-up site in Eastern Washington. While it's not as high up as some sites in the Rocky Mountains it does hold it's own. This shows a summer and winter situation. For the winter image the building is on the left, while the PV panels on the right. Obviously, antennas and brackets have to be strong enough to deal with this amount of ice loading and high winds.

If you are interested in installing your own tower in the Spokane area you may want to read over this document
document on city ordinances.
Right now it's a "draft" however, something you might want to check out.
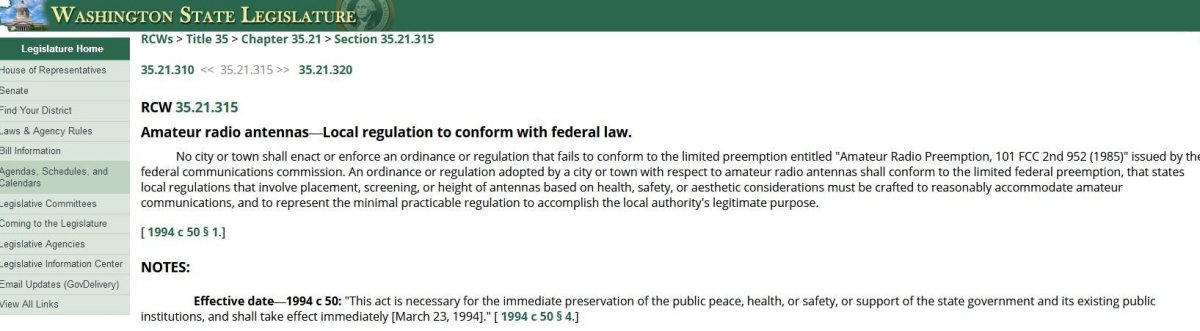
As of 2021 the Author found this Washington State law that appears to say amateurs are exempt from local city tower restrictions however, this has not been confirmed.
As covered earlier, the Author uses several brands of gear however, a leading vender is Petzl.
A couple documents that may be useful for your future training:
Inside the equipment room the stations are usually mounted on 19" racks as shown here.
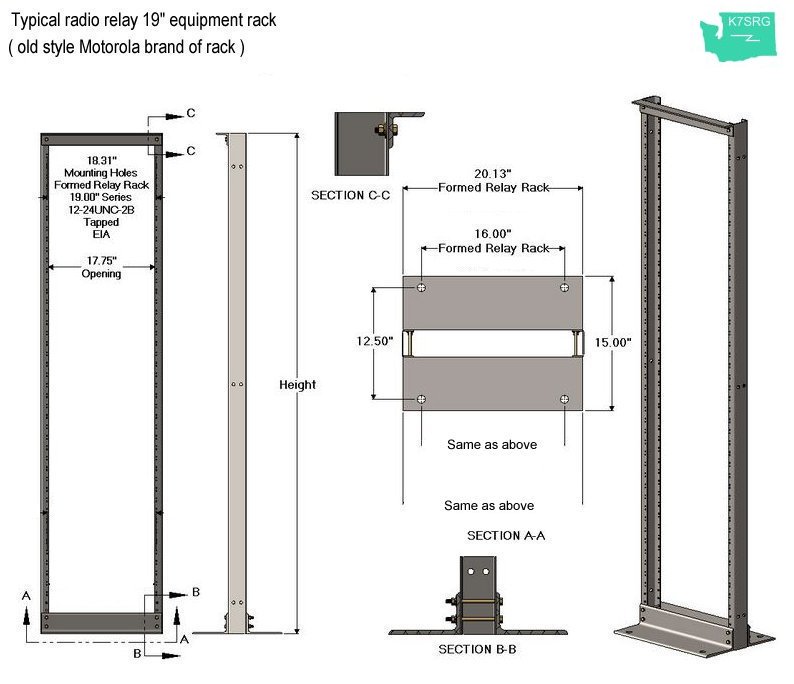
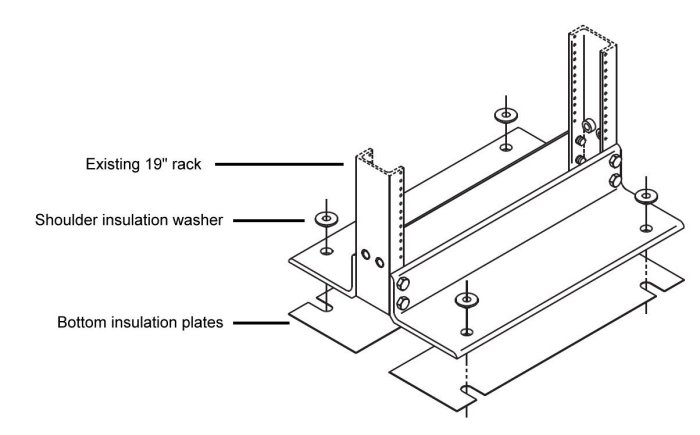
These racks should not touch the floor to prevent them becoming "lighting rods". One cheap way is to set them on a piece of plywood. However, wood will conduct to some degree when wet. Other materials such as rubber, neoprene, plexiglass or "teflon" (PTFE) would be a better choice. Another good way is use a rack/cabinet isolation kit which consists of four shoulder washers and two phenolic type plates. You can use whatever bolts you wish along with the concrete anchors (assuming the floor is concrete). Shown here is a starter kit the Author put together for one unit.

Here's a close up of installing such kit on an existing 19" radio relay rack. The purpose of the washers are to insulate the rack from the bolts (not shown) that connects to the concrete floor via the anchors that you had installed prior to this step. Install the shoulder washer upside down so the center section aligns the rack base to the middle of mention anchors and its holes. Normally, the bolts are 1/2" however, in a pinch you can use 3/8" bolts and anchors.
Here's the dimensions of washers for the racks the Author is using.
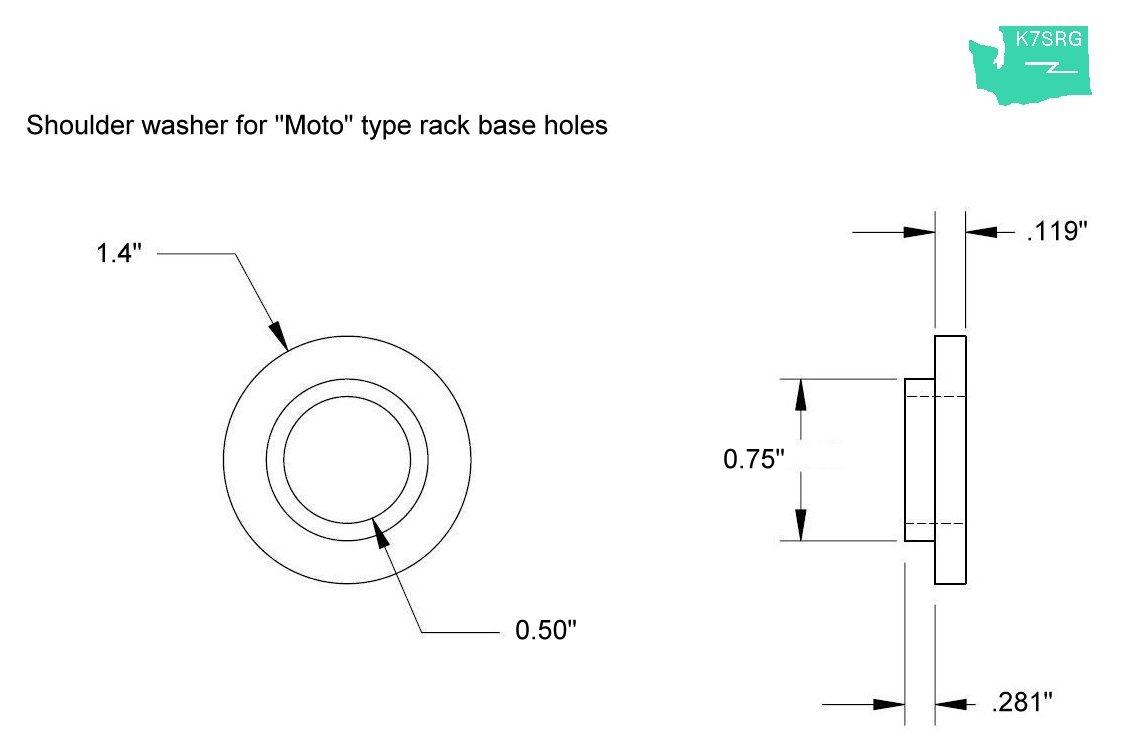
There is vender a few years ago that appears to have the correct washers for this application.
![[SRG home Direction]](images/srghome.gif)